Wednesday, April 22, 2009

Garden Wedding Decor

I've never been much of a gardener - I'll be honest. The previous owners of my house THANKFULLY did an amazing job landscaping my yard, so I just have to make sure it doesn't get overgrown or overrun with weeds (still a challenge!). That doesn't stop me from buying cute gardening gloves & all types of tools to dig things out of the ground (at least I'm prepared!)... I have good intentions. :)

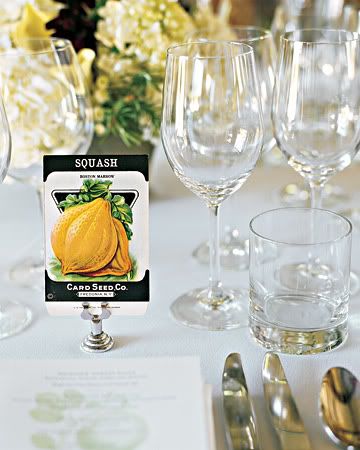
When it comes to gardens & weddings, I really love the idea of using common gardening items as decoration... especially for spring & summertime weddings

Example: Seed Packets. They make adorable table numbers. You can find flower, fruit & vegetable seed packets at your local lawn & garden store, or buy vintage seed packets on eBay or other antique shops online.


{Source}

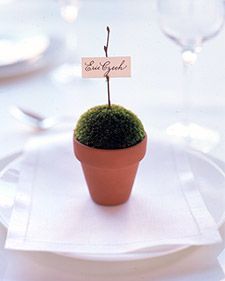
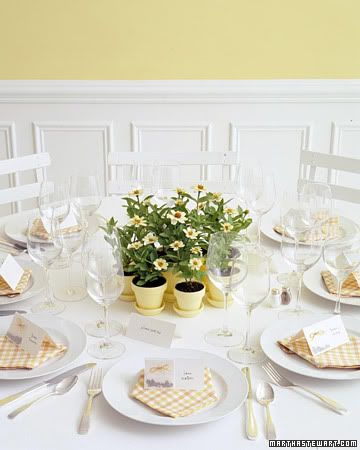
Another example: Potted Plants. They could be used as place cards or favors...


{Source: 1, 2}

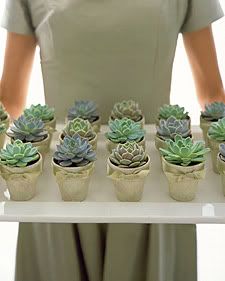
... and of course, as centerpieces! I just adore this color scheme + potted plant idea...


{Source}

Wednesday, April 15, 2009

Behind the Scenes: Photography

Photography is one of my favorite hobbies and something I don't think any couple should skimp on when planning their wedding. You will have these pictures forever, so make sure you choose a photographer that really meshes well with your personality and the style of your wedding. Most people know what to expect of a photographer on the day of a wedding - the photographer normally shows up to take some "getting ready" pictures, takes photos during the ceremony, and then stays to take pictures throughout the reception. But what then? What is your photographer doing when you're on your fabulous honeymoon?? What's happening to your pictures and how do they transform into the beautiful pictures that end up in your wedding album (and plastered all over the internet, if you're me!)?

Well you're about to find out!


Jessica from Lemongrass Photography has graciously offered to let us in on what goes on behind the scenes after the
pictures have been snapped and the work that happens to make your pictures beautiful!

{All images on this post are credited to Lemongrass Photography}
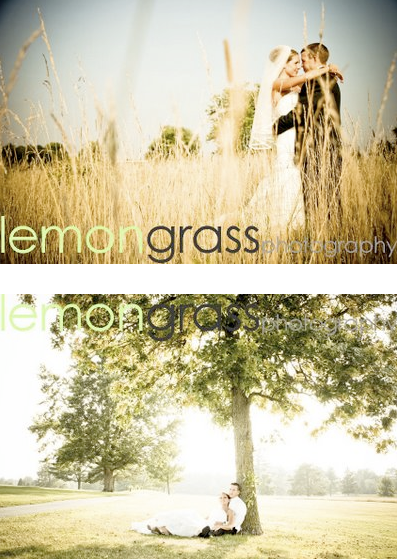


Jessica says her images are "fresh and bright and happy" and loves natural light to capture truly beautiful photos. "I love to have couples laugh and talk and kiss and hug, just like they would if I wasn't there. I do this by kinda "setting up" a couple in a great spot, and then just letting them interact. I don't "pose" them, instead I let their personalities shine through."
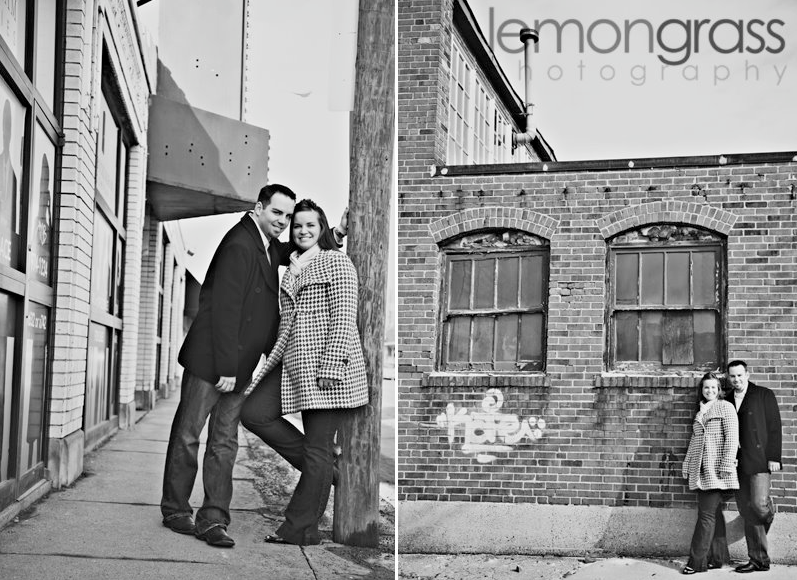


As for a typical wedding day timeline, Jessica says she likes to keep things as simple as possible for the bride & groom. Here are a few Lemongrass "perks" a bride & groom can expect on their wedding day:
  • Wedding day - take photos
  • Reception - see a sneak peek of photos in a slideshow (Author's side note: OMG, how does she do this so quickly?!)
  • Wedding night/next morning - download all images & post a few faves to the Lemongrass blog!
  • Two-five days post-wedding - finish editing pictures, design album & post more pics to the blog; add favorites to Facebook & tag the bride and groom
  • One week post-wedding - all images are posted to a gallery for family & friends (and bride & groom when they return from their honeymoon!)
Another special thing Jessica does is hand out little "mini" cards at the reception that gives all the guests the website and password to see the private photo gallery! Then they can order pictures for themselves, as well as just oohh and ahhh over the pictures!
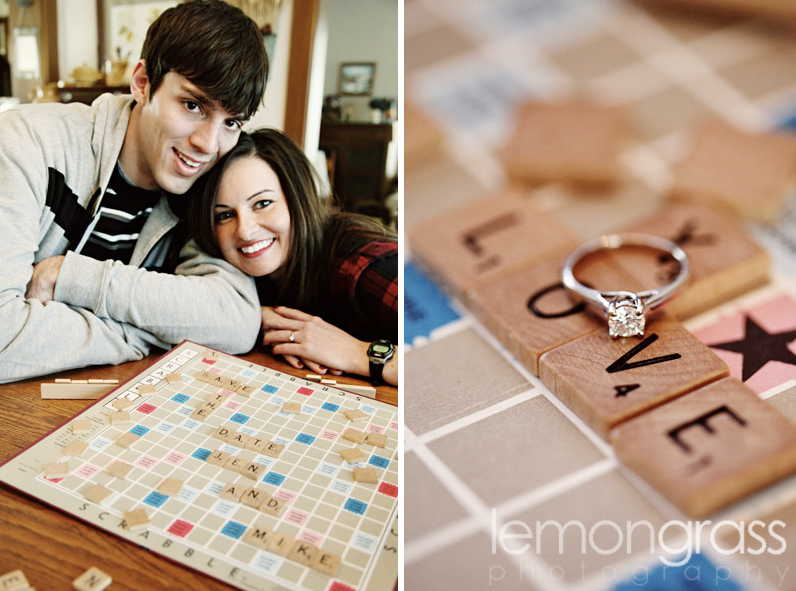


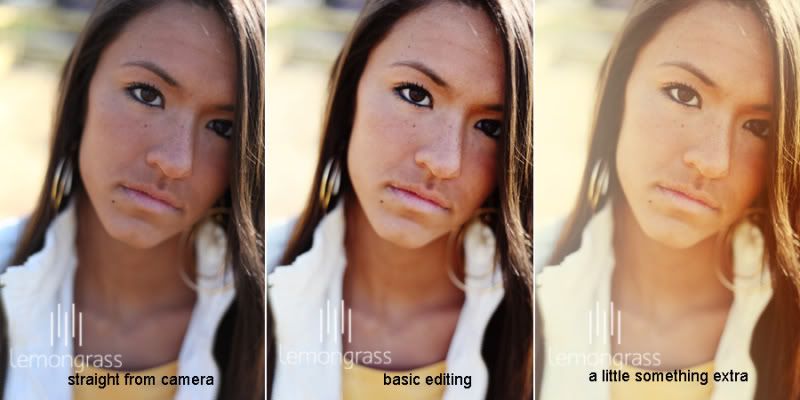
Now most of us know at least a little about Photoshop and what it's used for (image editing), and most photographers rely on some sort of editing after the picture is taken to maximize crispness & color. This is what gives your pictures that extra sparkle & vibrancy! Although Jessica aims to get the picture taken as close to perfect as possible right off of the camera (minimizing post-shoot editing as much as possible), she does use Photoshop to add some "extra oomph" to her photos. Here's a progression of Jessica's image editing:
One last important tip from Jessica about wedding photos:


"Photo editing definitely varies from photographer to photographer. I try to do everything in a very formulated manner, so that every image looks similar and they all have a flow and connection - this is super important when designing albums! I always try to take into account the couple, the day, the light... etc when I am creating photos for a couple, both while taking them, and after, during the editing stages. Wedding photographs are so full of love, and joy... they are just beautiful, and I am so lucky to be able to be a part of that!"


Thanks, Jessica, for educating us all on what happens behind the scenes after the wedding day!


And now for one last picture... ;)


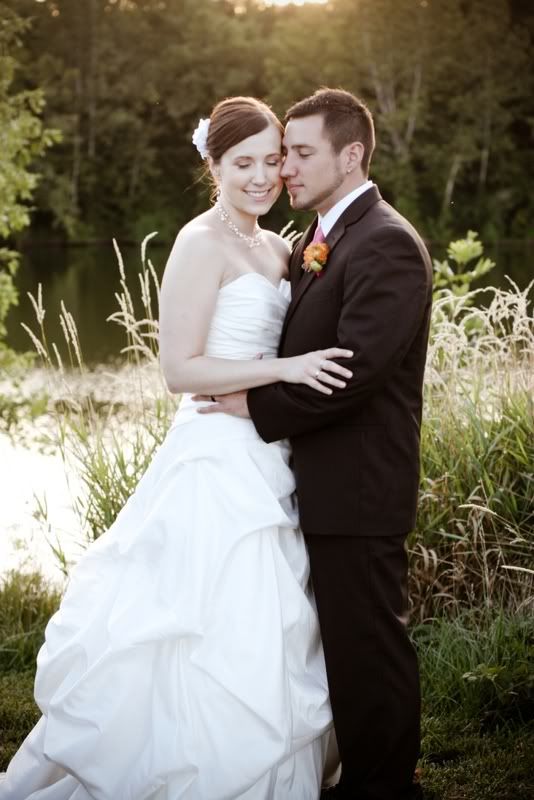
{My husband & me on our wedding day!}

Sunday, April 12, 2009

DIY - Custom/Repurposed Framed Sign

Just in case any of you are wondering - "How did Lindsey make that awesome frame for the bridal show??" - I thought I'd provide a little DIY instruction!

I think this project could be replicated with a couple's monogram or new last name and be a fabulous addition to the guest book table or head table.

Here's a picture of my bridal show materials all ready to go the night before the bridal show (I had to put them on the mantle because it's the only place in my house that Mo can't jump up to... yet...).


{Source - author's photo}


Materials
:
  • Medium/large framed canvas painting (I found an old painting with a decent wood frame at Goodwill for $12)
  • Vinyl in the design of your monogram/name/whatever (check your local listings for shops that make custom vinyl)
  • White Gesso (you can find it in the painting section at Michael's or other art supply store)
  • Medium-sized paint brushes + small paint brushes for detail work
  • Paint for the background of your sign (I took my business card to Wal-Mart's interior paint section and had them color-match some glossy wall paint to the exact color of my card; I bought the pint-sized can of paint)
  • Spray paint for the frame (I chose a satin-finish metallic silver color)
  • Glue gun & glue sticks
  • Razor blade/sharp, pointy object to separate the vinyl from the canvas after painting
Instructions:
  1. Carefully remove the canvas from the frame (NOTE: some canvases are stapled pretty securely to the frame, so you might need pliers or another object to aid you in this step).
  2. Set the canvas (painting side up) on a flat surface & use the white Gesso to cover up the existing painting (using a medium-sized paint brush). It doesn't matter if the texture of the original painting is visible - I think that adds to the charm of the resulting sign! Use 2-3 coats, or until the original painting is completely covered and the front of the canvas is entirely white. Long, sweeping strokes from left-to-right is a good Gesso technique for this purpose.
  3. When canvas is completely dry, position the vinyl on top of the canvas wherever you would like your monogram/name/whatever to be. Try to make sure there are no gaps between the vinyl and the canvas (minimizes paint seeping underneath).
  4. Paint over the vinyl with the glossy color paint & a medium-sized paint brush. Cover the entire canvas with paint & apply a few even coats.
  5. Before the color paint has a chance to dry completely, you need to peel off the vinyl to expose the white Gesso underneath. I used one of those razor-blade paper cutters (looks like a clicky pen, but when you click it, a sharp pointy blade comes out instead of a pen) to carefully peel away the vinyl from the canvas. Don't worry if some of the color paint seeped under the vinyl - we'll re-touch it soon!
  6. While the canvas is drying, spray paint the frame (use a few coats to ensure even coverage).
  7. When the canvas is dry, use the small paintbrushes and the white Gesso to touch up the white areas of the painting (your monogram or name).
  8. Allow touched-up areas and spray-painted frame to dry completely.
  9. Re-attach the canvas to the frame using a glue gun. I placed the frame face-down and glue-gunned the entire inner-rim of the frame, then placed the canvas face down into the rim. I kept the frame & canvas face-down for a while, to let the glue set.


{Source: author's photo}

Result: A chic, repurposed, hand-made sign that can be used many ways at your wedding, and can be displayed at your house post-wedding as a keepsake/memento!

Saturday, April 11, 2009

My First Bridal Show

Hello Friends!

This post is a bit delayed, but I received some pictures from Bustle Event Design's very first bridal show and had to share...

Here I am, waiting for the brides!


{All photos in this post were taken by Lemongrass Photography}

I attended The Indy Area Vendor Showcase at the Sheraton in downtown Indianapolis on Sunday, March 29th. It was SUCH a great experience and I made many connections with potential clients & other vendors. Erika from e-vents: a wedding and event planning boutique was the brains behind this event and she did an excellent job making it a success!

I worked with Pam from Entertaining with a Flair to order my linens for the table (through BBJ Linens), which definitely made my booth stand out a bit from the other booths.


The florist that created the arrangements for my wedding (back in August) - Shana Schutt - offered to make an arrangement for my booth, and it was stunning! Not only was it gorgeous, it smelled fabulous, too! Side note: Shana just launched her new website for Shana Schutt Floral Design. You should check it out!

Overall, I had a great time and was very happy with the turnout. :)

P.S. A special thanks to John from Enthusiast Apparel for donating the vinyl my husband and I used to DIY my framed sign!

Friday, April 3, 2009

Wish Jars

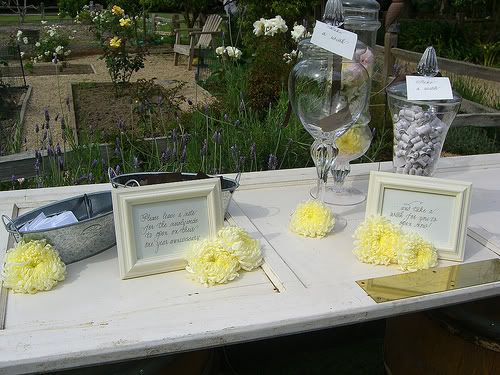
I came across an article on BridalBuds.com about guestbook alternatives, and I took a second to think about why the guestbook exists.

A guestbook is a paper or electronic means for a visitor to acknowledge their visitation to a site, physical or web-based, and leave their name, postal or electronic address (if desired), and a comment or note, if desired.
--Wikipedia.org

You already know the names of the people you invited to your wedding, and if you sent out invitations, you already have their address… Hmm. The guestbook seems a bit superfluous!

More and more couples are opting out of the guestbook tradition, and I completely understand why! Here’s what ends up happening: You order a journal-like book that has 100+ pages and only a few of the pages end up being used. You are left with something that is definitely sentimental, but hardly used! After my wedding, I used some of the extra pages in my guestbook to record gifts that people gave me, but I still have about 75% of my guestbook unused. So why not explore other ideas??

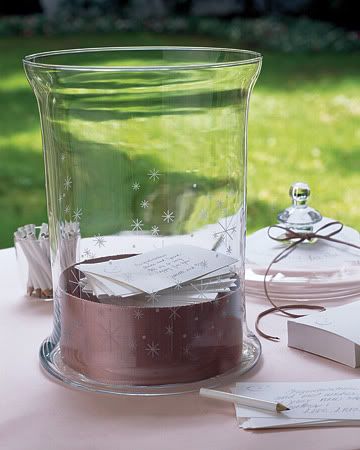
One option I really like is the “wish jar”.


{Source: this image is from MarthaStewart.com, but I grabbed it from BridalBuds.com & can't find the original Martha link!}


As I stated above, I saw this idea on BridalBuds.com and thought it was so cute! Your guests can write sweet notes on cardstock (or whatever) and you can later take the notes and put them in a scrapbook (after your honeymoon, of course!). The author of the article takes it up a notch and is going to have Polaroid cameras by the wish jar so guests can take photos of themselves when they submit their wishes! How awesome!

What’s great about this idea is that you can DEFINITELY make this happen yourself. Go buy a pretty apothecary jar, birdcage, basket or other type of container; cut up some squares of paper (the BridalBuds author used left-over paper from her invitations – yay for re-using!); make some sort of sign that tells your guests what the wish jar is and what it’s for; set out some pens and you’re set!

Tuesday, March 24, 2009

Night Sky Lanterns

As many of you know, I Twitter. And because I Twitter, I was lucky enough to find and follow Ian McGraw: co-owner (with his wife) of Veil & Train, which offers wedding photography, bridal makeup, bridal hair & personal training; based out of London, England. Take a second to view their blog and website!

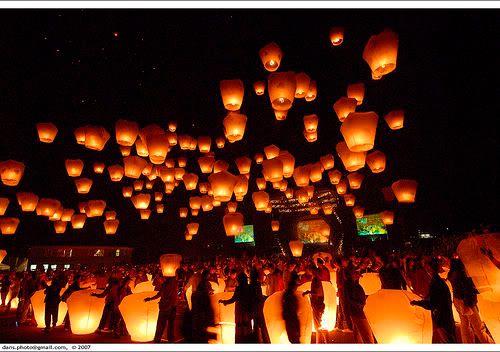
Anywho, last week, Veil & Train posted about Night Sky Lanterns on their blog and I was completely blown away! I will let this picture describe what Night Sky Lanterns look like:


The lanterns are environmentally friendly (friendlier than fireworks!!) and are made of biodegradeable materials (don't believe me? check this FAQ for more info). Once released, the lanterns will fly for about 5-10 minutes, creating a BEAUTIFUL photo op in the night sky!!!
You could ask guests to write wishes for the bride & groom on the lanterns & then release them to the sky at the end of the night. I wish I could have done this for our wedding!
To purchase, visit Sky Lanterns 2U's online store. The white lanterns are most popular, and you can purchase 100 for 151 GBP (United Kingdom Pounds), or about $223 USD (based on today's exchange rate).

Thursday, March 19, 2009

Red Lips + My Wedding Dress!

I don't normally post about ME on the Bustle Blog, but I had to showcase the makeup artistry & photography of two vendors who made this Trash the Dress session possible!

NaShara from Bridal Beauty by Blush asked me if I'd be a model for an upcoming Trash the Dress shoot, where she would do the makeup and Jessica from Lemongrass Photography (who has now seen me in my wedding dress 3 different times!) would provide the photography. Of course, I said yes! I love any excuse to wear my wedding dress again (although this time, I was a little scared it wouldn't FIT)!

{All pictures in this post are credited to Lemongrass Photography}

NaShara thought I would look good with a bright red lip. I was kinda scared to go so bright, but I think it looks good in the pictures! Always trust the professionals!


We took pictures downtown at Military Park, outside the historical society & then made our way up to the IMA...


When we got to the IMA, NaShara decided to tone down the red lip and switch to a more pink/purple gloss, which was also very pretty.


There was also another bride (also named Jessica) at the photoshoot, and coincidentally, we showed up with the SAME EXACT WEDDING DRESS!!! How crazy is that?!


Anyways, I had a fabulous time and it was nice to know that my dress still fit!! :)

xoxo

Lindsey