Showing posts with label DIY. Show all posts

Monday, April 5, 2010

Do It Yourself: Programs

My friend is in the final stages of planning her wedding, and she's trying to decide how the ceremony program should look. She's very much a D.I.Y. girl, so she's looking for a program that she can put together herself (or with help from her bridesmaids!) but that looks classy and fun. So, I'm doing some preliminary research.

For an outdoor wedding, or for a wedding when it's hot out (my friend's is in July), check out these programs printed on fans.

Both types of programs are easy to customize online, or you could find a local printing shop to create them for you without busting your budget.

And here's a simple but great idea - a long rectangular program, like this one.

With a little effort and the right tools - like cardstock, a paper-cutter, and a printer - you could definitely create these on your own. Best of all, it's easy to jazz up a program like this. Just punch 2 small holes at the top and tie a ribbon through, or mount the program on another piece of cardstock to add some dimension.

Another program style you could create on your own is the bi-fold or tri-fold.

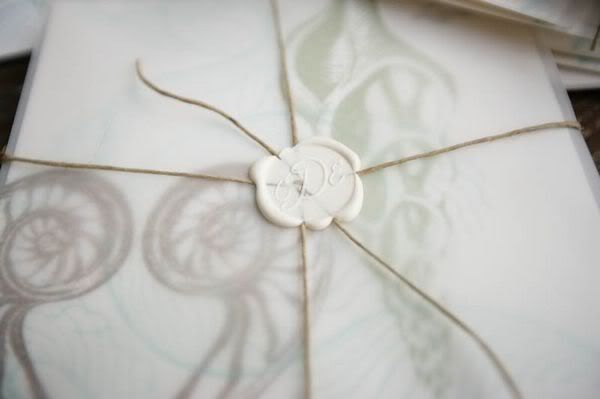
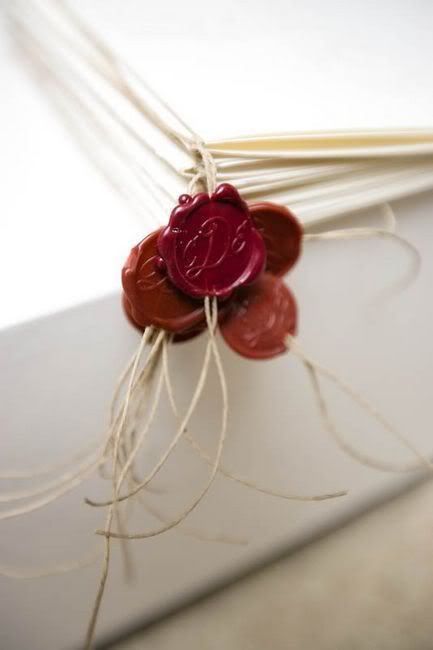
Bi-folds, if they contain more than just one sheet of paper, can be bound together with ribbon so you don't have to mess with staples. Tri-folds just have to be folded carefully into three sections.

If designing your own wedding program seems daunting, just start searching the web for pictures and templates. There are tons of ideas out there - you just have to find the one that fits you.

Monday, September 28, 2009

Thinking Outside the Book

Are you looking for wedding guestbook ideas that are more you than the usual cream-colored book with lined pages inside? Well, here are a few tips on ways to make your guestbook into something more than just a book on a shelf.

A simple and popular idea is to frame a great photo of the two of you, give it a large mat and a beautiful frame, and have guests sign the mat. Ta-da – instant and meaningful artwork!

If you’re wondering how to announce your marriage to far-flung friends and family, consider creating a postcard guest book. Collect postcards from places that hold meaning for both you and your significant other – the city where you get married, your hometowns, your favorite vacation spot – then create a small package that you send to friends and family. Include a postcard, stamped and self-addressed, along with a note announcing your marriage and ask them to mail you their well wishes. When you get the postcards back, put the cards in a photo album or take them to a local copy store and have a custom album created.

(Source)

One couple we know, Lindsay and Eric, were looking for a guestbook idea when they came across the window frame from Lindsay’s grandparents’ old house. They put a mirror behind it, and had guests sign the mirror with Sharpie markers. How cool is that?!

(Source: author's collection)

There are no rules when it comes to choosing how you want your guests to mark their presence at your reception. Our suggestion - make it your own, and have fun!

Wednesday, July 22, 2009

Free Typefaces for DIY Projects

I have always been kind of obsessed with typefaces (most people call them "fonts", but my graphic designer husband always cringes when I say the "f" word, so I'm trying to train myself to use "typeface" instead...).

Example: When I was in high school or college and I had to write a paper, I would spend a good 15 minutes highlighting everything I wrote and changing the typeface a million times, just so I could see what my paper would look like in each style.

I really like "Tahoma"... or maybe "Georgia" looks better... but to be safe, maybe I should just change it back to "Times New Roman"...

Fast forward a few years and I STILL DO THIS on a regular basis. Choosing my default typeface for my e-mail messages in Outlook is like a 2-hour task! :)


If any of you are like me - you know who you are (you're probably the same person that pilfers cool pens at the doctor's office) - you will LOVE the many many FREE typeface options over at DaFont.com.


I am sharing this on the Bustle Blog because you might be undertaking a DIY wedding project that involves words of some sort and you might be looking for a non-standard typeface to use that tells your guests, "Maybe she hired a designer to create this..." A non-Microsoft-Word typeface gives your program/invitation/place cards a more custom look & feel. And they are FREE! It can't get any better than that.

Here are my favorite typefaces from DaFont.com:


Honey Script (for obvious reasons!)


Chopin Script (Sweet & romantic...)


Outlaw (How great at a western/country-themed wedding?!)


Type Keys (Super-cute if you are using a typewriter or typewriter keys anywhere at your wedding!)


My advice is to head on over to DaFont.com and check out all of the categories of typefaces - you can even type in a word (like I did with "Bustle") or phrase so you can "test" how it will look for whatever project you are working on. Have fun!!

UPDATE: My husband schooled me a little bit on what NOT to use these free fonts for. He said that although you can definitely use them to make one/a few words stand out, they should not be used for lots of text (i.e. a long quote, directions, etc). The reason is because most of the font designers over on DaFont.com are not professional designers and don't give consideration to the spacing between letters and other technical things that only a true preofessional would know how/take the time to do. AND, can you imagine how difficult/annoying it would be to read a paragraph of Type Keys (above)??? :)

Bottom Line: Use these special fonts sparingly to make key words stand out. Stick to standard, professionally-designed fonts for longer phrases/paragraphs. Got it? Good.

Tuesday, May 26, 2009

My Version: DIY Centerpieces

I hope everyone had a lovely Memorial Day weekend! While relaxing indoors (since it was rainy most of Monday in Indy), I made a few tissue paper flowers like I mentioned I would in my last post. Here are some pictures:

I decided to go for a peach & turquoise color palette...


{Source: author's personal collection}

I must have bought the most delicate tissue paper ever because the layers were super-difficult to pull apart, but I think the end-result was quite lovely! I bought a multi-color tissue paper pack from JoAnn's Fabric for about $10.

Here's one big flower - I think it looks cute all by itself!


I used cheap-o glass containers (old soda bottles, juice carafes, anything I could find that was glass and wasn't cracked) from Goodwill - I love the look of non-matching vases.

It took me about 5 minutes to make each flower, so if you were thinking about doing this for your wedding, you should allocate approximately this amount of time per flower.

Friday, May 22, 2009

Another DIY Centerpiece Idea

I just saw this DIY flower arrangement idea on Country Living (I occasionally browse this website for decorating inspiration) and thought it looked so easy & simple - I had to post about it for the crafty brides!


{Source}

Imagine tissue/crepe paper flowers in your wedding colors, or if you are a sewing-fanatic, flowers cut from vintage sewing patterns (like in the picture above)! Click here for instructions (skip to the second slide in the slideshow).

I am DEFINITELY making some of these flowers for the sad, empty vases currently sitting on the mantle above my fireplace. :)

Thursday, May 21, 2009

Quick & Cheap DIY Centerpieces

No advanced degree in crafting or crazy rare materials necessary for these centerpieces! You can probably find everything you need for these lovely arrangements at your local supermarket/bulk goods store... Gotta love easy & cheap!

Thanks to Real Simple for posting about these 60 Second Centerpieces (via With This Ring):


{Source: 1, 2}

Lemons & nuts piled together in a glass bowl would be fabulous sitting atop reception tables at a summer wedding...

Clusters of multi-height pillar candles look classic and romantic - perfect for an evening reception any time of year!

Sunday, April 12, 2009

DIY - Custom/Repurposed Framed Sign

Just in case any of you are wondering - "How did Lindsey make that awesome frame for the bridal show??" - I thought I'd provide a little DIY instruction!

I think this project could be replicated with a couple's monogram or new last name and be a fabulous addition to the guest book table or head table.

Here's a picture of my bridal show materials all ready to go the night before the bridal show (I had to put them on the mantle because it's the only place in my house that Mo can't jump up to... yet...).


{Source - author's photo}


Materials
:
  • Medium/large framed canvas painting (I found an old painting with a decent wood frame at Goodwill for $12)
  • Vinyl in the design of your monogram/name/whatever (check your local listings for shops that make custom vinyl)
  • White Gesso (you can find it in the painting section at Michael's or other art supply store)
  • Medium-sized paint brushes + small paint brushes for detail work
  • Paint for the background of your sign (I took my business card to Wal-Mart's interior paint section and had them color-match some glossy wall paint to the exact color of my card; I bought the pint-sized can of paint)
  • Spray paint for the frame (I chose a satin-finish metallic silver color)
  • Glue gun & glue sticks
  • Razor blade/sharp, pointy object to separate the vinyl from the canvas after painting
Instructions:
  1. Carefully remove the canvas from the frame (NOTE: some canvases are stapled pretty securely to the frame, so you might need pliers or another object to aid you in this step).
  2. Set the canvas (painting side up) on a flat surface & use the white Gesso to cover up the existing painting (using a medium-sized paint brush). It doesn't matter if the texture of the original painting is visible - I think that adds to the charm of the resulting sign! Use 2-3 coats, or until the original painting is completely covered and the front of the canvas is entirely white. Long, sweeping strokes from left-to-right is a good Gesso technique for this purpose.
  3. When canvas is completely dry, position the vinyl on top of the canvas wherever you would like your monogram/name/whatever to be. Try to make sure there are no gaps between the vinyl and the canvas (minimizes paint seeping underneath).
  4. Paint over the vinyl with the glossy color paint & a medium-sized paint brush. Cover the entire canvas with paint & apply a few even coats.
  5. Before the color paint has a chance to dry completely, you need to peel off the vinyl to expose the white Gesso underneath. I used one of those razor-blade paper cutters (looks like a clicky pen, but when you click it, a sharp pointy blade comes out instead of a pen) to carefully peel away the vinyl from the canvas. Don't worry if some of the color paint seeped under the vinyl - we'll re-touch it soon!
  6. While the canvas is drying, spray paint the frame (use a few coats to ensure even coverage).
  7. When the canvas is dry, use the small paintbrushes and the white Gesso to touch up the white areas of the painting (your monogram or name).
  8. Allow touched-up areas and spray-painted frame to dry completely.
  9. Re-attach the canvas to the frame using a glue gun. I placed the frame face-down and glue-gunned the entire inner-rim of the frame, then placed the canvas face down into the rim. I kept the frame & canvas face-down for a while, to let the glue set.


{Source: author's photo}

Result: A chic, repurposed, hand-made sign that can be used many ways at your wedding, and can be displayed at your house post-wedding as a keepsake/memento!

Monday, March 16, 2009

Edible, Cost-Effective Centerpiece

And no, I'm not talking about those edible fruit bouquets! :)

I saw this picture on Style Me Pretty's blog and thought it was such a no-brainer centerpiece idea!


Instead of flowers, make your centerpieces do triple-duty as appetizers AND beautiful table arrangements AND yummy incentives for your guests to locate their tables once they arrive at your reception.

Tuesday, February 10, 2009

Tin Can Centerpieces

I simply adore this centerpiece arrangement:


{Source; found via The Bride's Guide}

Of course this idea is brought to you by Martha Stewart! This centerpiece collection actually doubles as guests' favors to take home at the end of the night. Double-duty and cost-effective!

If you are interested in doing this for your wedding, ask family members & friends to start saving their coffee & spice tins. To supplement the tins you find around the house & those that are donated to you, check out eBay for antique & vintage tins.

Monday, December 29, 2008

Wax Seals

When I was younger, I loved to write letters to people. One Christmas, all I really wanted was a calligraphy set and a wax seal kit, so I could make my letters really nice and antique-looking. My ambition to teach myself calligraphy waned soon thereafter, but my affinity for wax seals still runs strong!

I was so happy to see these images on WeddingbeePRO's blog (posted by Flush Designs):


{Image Source (for both pics)}
Using wax (in your wedding colors!) & and a monogrammed seal in place of a knot or bow to hold programs/favors/invitations together adds an extra touch of personalization!
You can buy wax & monogrammed seal kits here for $34.

Thursday, December 18, 2008

Glitz on the Cheap

Oh, Martha, how you inspire me so...


I just saw this easy DIY project on Martha Stewart's website in a Christmas Table Settings photo gallery: Glitter-covered candles.


{Image Source}


Directions: Lay candles in a box, spray with adhesive, then cover with glitter. Let dry for a few hours or overnight.


I think a centerpiece consisting of 4-5 various heighth glitter-covered pillar candles would be so chic and simple. Candlelight makes everyone's complexion look better and adds a tough of romance to the atmosphere. What's not to love about candlelight?! The glitter adds a little glam to an otherwise super-simple centerpiece.


You can buy pillar candles in bulk from sites like Candles 4 Less, Candles Just Online (huge sale on unscented pillars right now!), and Quick Candles. Glitter and spray adhesive/craft glue can be bought at just about any craft store for relatively low prices.


NOTE: Always opt for unscented candles. Not only could scented candles bother some of your guests' noses, but scented candles muddle the yummy smells of the food you serve and could even affect how the food tastes. PLUS, unscented candles are generally cheaper than scented.

Wednesday, December 10, 2008

Rolodex Seating Cards

This is one of the best seating card ideas I've ever seen! So simple (you can DIY), yet ultra-effective in getting your guests where they need to go at your reception.


{Image Source}


Rolodex Seating Cards!


Imagine how cute this would be if the bride or groom worked at a library (think: Dewey Decimal System!). :)


The full DIY post and more pictures can be found here on Vintage Glam's blog.


{Blog post found via Elizabeth Anne Designs}

Saturday, November 22, 2008

My DIY Fall Decorations

I had the house all to myself today, so I was finally able to make some Fall decorations for my house! A little late, I know, but I'm hosting Thanksgiving for my in-laws next Thursday and I want my house to look festive!

I found some awesome inspiration all over the web for these projects, so I'll try to post the
original links in case you want the directions for each project.

Here's an overall view of my new buffet with most of the decorations on top...


My first project was the plaid "artwork" with brown yarn string... I got my inspiration from Better Homes & Gardens' article: Easy Holiday Decorating with Ribbon. Although this piece doesn't involve ribbon, it does involve using up a leftover piece of padded poster board and some $1.50 fabric from Walmart. :) I added the brown yarn after viewing how Miss Blush packaged her bridesmaid gifts over on Weddingbee.


My second project was making yarn pom poms. These turned out so cute!!! I was inspired by Koala Brains' Billy Buttons tutorial. Once I had three poms in each color, I put them in a clear narrow vase from Walmart and wrapped each vase in some orange ribbon I had left over. I also stuck some straw in there for good measure.


My third project was making the leaf candle holders. Michael's has all of their fall decor on sale for like 70-90% off (don't quote me on that... but they were super cheap), so I picked up some semi-translucent artificial fall leaves for 75 cents. I can't remember where I saw this idea, but it's so simple... I just used double-stick tape to stick each leaf on the candle holder, then secured with a straw bow. I found my candle holder at Walmart. In fact, all of the glass items I used today were from Walmart.


The last DIY project for this post (I did a few more things, but forgot to take pictures!) was the clothespin place card. I actually thought this up myself! I bought the clothespins for another project (Christmas gift: fun paper-covered clothespin magnets), but thought it would be so much fun to attach name cards to the clothespins and clip onto the side of each guest's wine glass. For an added touch, I stuck some small fake leaves to the bottom. I love how these look, and I just know my guests will love them, too!

Friday, October 31, 2008

If You're Going to DIY...

... you must purchase these things!

The wonderful Mrs. Penguin over on Weddingbee (I am slowly overcoming my addiction to their blog posts, but will probably never unsubscribe on my GoogleReader) just posted her Top 5 DIY Essentials, and I think you should read it! As a recap, here are the things a DIY bride shouldn't do without:
  1. Paper cutter (for invitations, programs, anything paper)
  2. Xyron machine (turns any paper item into a sticker)
  3. Gocco (for the very crafty brides; like a silk-screen machine for paper and fabric... currently, this machine is super-hard to get a hold of and I just heard that the bulb manufacturers were stopping the production of Gocco bulbs... a death sentence for the proliferation of the Gocco... Read more about Gocco on Weddingbee's wiki)
  4. Round corner punch (this is the only item on this list that I actually own... and I own the kind Mrs. Penguin refers to with "evil dagger eyes"... guess I should go out and buy the more ergonomic version!)
  5. Envelope template kit (I've wanted one of these for the longest time!)
My husband and I DIY-ed our programs, placecards, placecard holder (ribbon board) and table numbers and the number one thing I still cannot live without is...


THE ADHESIVE ROLLER!


{Picture Source}

This little device has a spool of sticky adhesive that easily rolls onto and adheres to wherever you glide the tip of the roller. There are many brands of roll-on adhesive ~ I've tried a few different kinds and to me, they all work just the same ~ and the one pictured above is $2.96 on Amazon. FYI... refills available for purchase, so you don't have to keep buying the roller itself.

TR and I used these rollers to assemble our invitations (we bought 2 adhesive rollers + LOTS of refills so we could both work at the same time) and our placecards... and I don't think I could ever go back to wrapping presents without a tape roller ever again!

Monday, October 27, 2008

Pumpkin Carving

TR and I have decided to do some pumpkin carving this week and I found some adorable designs over on Southern Living's website:


I really like the bottom pumpkin with the floral design and also the fall leaves pumpkin. TR is probably going for a really scary design, so I'll have to put my sweet pumpkins on the other side of the porch. :)

I also really love the look of painted pumpkins for centerpieces or Thanksgiving decor (picture below). Although I think we can all slap some paint on a pumpkin without detailed instructions, Martha Stewart offers video directions for making these gorgeous glitter gourds:


I might just have to make both kinds of pumpkin decorations!

Thursday, October 2, 2008

What I Wish I Would Have Known #3

You really CAN have a do-it-yourself wedding!

Many brides start planning their wedding with the idea that they will make everything themselves. Why buy an aisle runner from a store when all you need is some muslin, a printer, paper, tape, paint, and a bit of thread?? I never once thought I could be that type of bride. My crafty skills are rusty (I haven't made anything since a clay thumb-pot in the 5th grade) and I just figured I'd have to pay for pre-made items.

I was so wrong. Sadly, I discovered my favorite wedding blogs about three months prior to my wedding date. After reading so many excellent ideas for my wedding & reception, I was ITCHING to do something creative. I wanted EVERYTHING to have a handmade touch. This is the dangerous effect of wedding blogs! After telling my fiance all of my "fun ideas", he practically begged me to forget them all. He's seen me stressed out, and he was trying to prevent a meltdown. But I really, really wanted to make something - anything - for the wedding. If nothing more than to say to someone, "I made that!"

I toyed with the idea of cancelling on my florist so I could hand-make paper flower arrangements (see below) - I even went so far as to warn my florist I was thinking about this idea - but after making ONE FLOWER from
Paper Source's flower kit, I decided against it. There was NO WAY I was going to put myself through the torture of making a hundred or more paper flowers.

Bottom line: There was just not enough time to make all of the things I wanted to make. I should have started reading these blogs MONTHS beforehand!! But I didn't even know wedding blogs existed during the first half of our engagement. To think of what could have been had I discovered Weddingbee at the 12-month-away mark...

Here are some pictures of what my flowers could have looked like (images from
Paper Source):


One project I was able to complete (with the help of a particularly crafty bridesmaid) prior to the wedding was the place card ribbon board display. I was inspired by this picture on Martha Stewart's website:


{Image Source}

Each of these cute ideas were featured on various wedding blogs. I have started a list of my favorite blogs on the side of my blog ~ please take a look! You might just be inspired to make something!!